Selenium Grid With Docker

Automation using Selenium WebDriver has been in practice for sometime now. But constantly evolving products have led to every growing set of requirements for automation frameworks such as speeding of tests, cross browser coverage, different browser versions coverage, operating systems etc. Selenium has got it covered in the form of Selenium Grid.
Selenium Grid
Selenium Grid is a proxy server based on hub-nodes architecture. It facilitates easy process to run tests in parallel across multiple machines(nodes).

In Selenium Grid, one server acts as the hub that routes JSON formatted test commands to one or more registered Grid nodes. Tests contact the hub to obtain access to remote browser instances.
For example: A hub can be connected to three different nodes, each running a separate browser or different browser version. When tests are run, request is sent to hub which searches for node with specified criteria(such as browser version, browser kind). Once hub manages to locate it, scripts are sent to the node and tests are run.
But Why Docker?
Firing up Selenium Grid architecture can be lengthly process. Selenium JAR will have to be downloaded in hub and each of the node. After this you have to fire the command in the hub to get the server up. From that, you can get the IP address. In the nodes, you can get the server up by adding the IP of the hub and port number. This is very time consuming and tedious process.
Things become more difficult to manage when tests are required to be run on different versions of a browser. Managing multiple browser versions on a system and running tests on them is an exhausting process.
Docker manages these tasks with relative ease.

You can install node browsers of desired versions and can spin up as many containers in parallel as you require.
Docker is also lightweight and does not use system resources like VM’s.
Whole infrastructure can be easily spin up and tear down with docker-compose.
Getting Started
I hope you have installed docker on your systems. If not, please install.
For this article, I am using google chrome and firefox browser nodes.
- Pull the following docker images:
selenium/hub
$ docker pull selenium/hub
Image for running Grid Hub
selenium/node-chrome
$ docker pull selenium/node-chrome
Grid Node with Chrome installed, needs to be connected to a Grid Hub
selenium/node-firefox
$ docker pull selenium/node-firefox
Grid Node with Firefox installed, needs to be connected to a Grid Hub
Note: By default, docker installs the latest available browser versions.
Verify if the images are reflected in the system by using:
$ docker images

2. Set up infrastructure using docker-compose.
DOCKER COMPOSE
Compose is a tool for defining and running multi-container Docker applications. With Compose, you use a YAML file to configure your application’s services.
Then, with a single command, you can start and tear down the whole infrastructure consisting of multiple services.
Before starting, you are required to install compose. Incase you have not, please install.
Adding sample docker-compose.yml file that will be used in this article.
version: "3"
services:

  hub:
    image: selenium/hub
    ports:
      - "4444:4444"

    environment:
      GRID_MAX_SESSION: 16
      GRID_BROWSER_TIMEOUT: 3000
      GRID_TIMEOUT: 3000

  chrome:
    image: selenium/node-chrome
    container_name: web-automation_chrome
    depends_on:
      - hub
    environment:
      HUB_PORT_4444_TCP_ADDR: hub
      HUB_PORT_4444_TCP_PORT: 4444
      NODE_MAX_SESSION: 4
      NODE_MAX_INSTANCES: 4
    volumes:
      - /dev/shm:/dev/shm
    ports:
      - "9001:5900"
    links:
      - hub

  firefox:
    image: selenium/node-firefox
    container_name: web-automation_firefox
    depends_on:
      - hub
    environment:
      HUB_PORT_4444_TCP_ADDR: hub
      HUB_PORT_4444_TCP_PORT: 4444
      NODE_MAX_SESSION: 2
      NODE_MAX_INSTANCES: 2
    volumes:
      - /dev/shm:/dev/shm
    ports:
      - "9002:5900"
    links:
- hub- version: 3. It is the latest version of the docker-compose files.
- services(containers): This contains the list of the images and their configurations.
- image: It defines which image will be used to spin up container.
- ports: Published ports with host:container format.
- volumes: It mounts the host path to service with host:container format.
- container_name: You can give name to your containers.
- depends_on: This defines the required dependency before spinning up the container. In our docker-compose.yml file, containers chrome and firefox are dependant upon container hub to spin up.
- NODE_MAX_INSTANCES: This defines how many instances of same version of browser can run over the Remote System.
- NODE_MAX_INSTANCES: This defines how many browsers (Any Browser and any version) can run in parallel at a time in the remote system. So this overrides the Max Instances settings and can restrict the number of browser instances that can run in parallel.
Note: I am spinning up the first container: selenium-hub using selenium/hub image on port 4444. This port is later mapped to the nodes in their respective environment params. This hub can support upto 16 tests at one time and has a grid timeout set to 3000 seconds.
Time to set up our infrastructure!!
$ docker-compose -f /path/to/docker-compose.yml up -d

-d : Detach mode.
$ docker ps

You can also verify status of your grid by checking the following url on your browser.
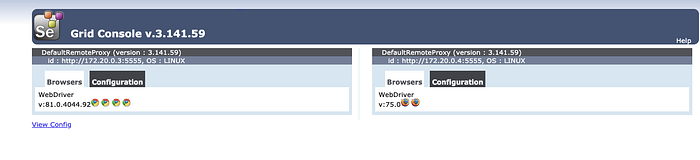
So far so good. Containers are up. Now we have to configure our code and run our tests.
3. Configuring Testng.xml file.
<!DOCTYPE suite SYSTEM "http://testng.org/testng-1.0.dtd" >

<suite thread-count="2" name="SeleniumGridDocker" parallel="tests">


    <test name="Chrome Test">
        <parameter name="browser" value="chrome" />
        <parameter name="Port" value="9001" />
        <classes>
            <class name="TestClass" />
        </classes>
    </test>

        <test name="Firefox Test">
            <parameter name="browser" value="firefox" />
            <parameter name="Port" value="9002" />
            <classes>
                <class name="TestClass" />
            </classes>
        </test>

</suite>
Since in step 2, I fired up node-chrome on port 9001 and node-firefox on port 9002. I will be providing the same in Testng.xml file to map them with their respective driver instantiation code mentioned below:
@Parameters({"Port"})
@BeforeClass
public void initiateDriver(String Port) throws MalformedURLException {
            if(Port.equalsIgnoreCase("9001"))
    {
        driver = new RemoteWebDriver(new URL("http:localhost:4444/wd/hub"), DesiredCapabilities.chrome());
        driver.manage().window().maximize();
    }
    else if(Port.equalsIgnoreCase("9002")){
        driver = new RemoteWebDriver(new URL("http:localhost:4444/wd/hub"), DesiredCapabilities.firefox());
        driver.manage().window().maximize();
    }
}
This configuration in Testng.xml enables tests to run in parallel on both chrome and firefox node instances.
4. Time to run tests!!
$ mvn clean test -Dsurefire.suiteXmlFiles=Testng.xml
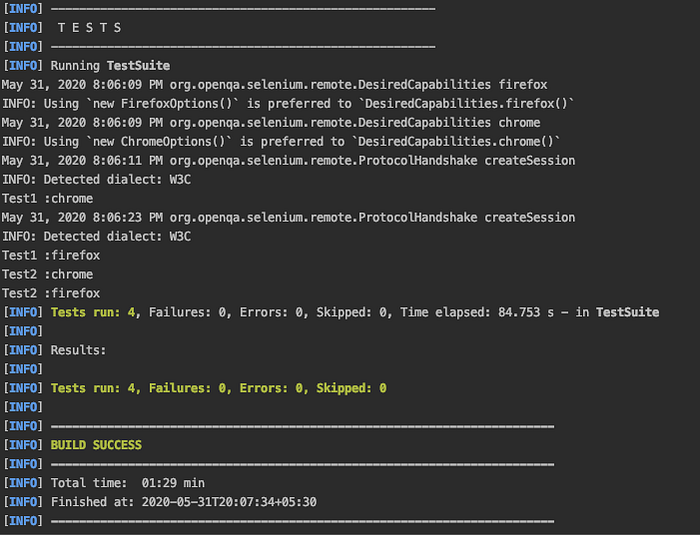
For this article, I am using 2 tests: Test1 and Test2. As you can see in logs, both tests ran on chrome and firefox, but in parallel mode and took 1 min: 29 secs.
If the same tests are run on firefox only, they take 1 min:20 secs.
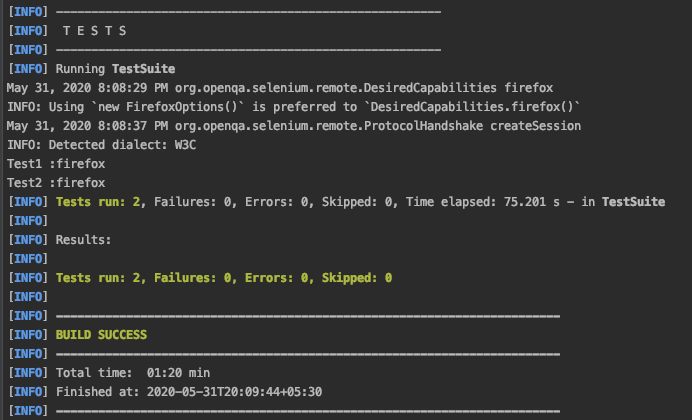
If you want to reduce the execution time even more, try running the methods in parallel.
5. Tear Down the infrastructure.
$ docker-compose -f /path/to/docker-compose.yml down
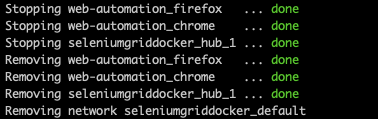
Containers will be stopped. Grid network will be destroyed.
$ docker ps

You can verify the same using above command. No running containers will be there.
Summary
In this article, I have covered automation infrastructure set up, tests suite run , infrastructure tear down without any hassle. By using this approach, you can save lot of time and get accurate results in cost effective manner. If you have a decent enough hardware system, you can explore the power of parallel approach even more.
I hope this article has been helpful to the enthusiasts who are looking to implement cross browser web automation.
Take care. Keep Learning. Stay SAFE.
